> For the complete documentation index, see [llms.txt](https://user.netmera.com/netmera-user-guide/llms.txt). Markdown versions of documentation pages are available by appending `.md` to page URLs; this page is available as [Markdown](https://user.netmera.com/netmera-user-guide/messaging-features/automated-messaging.md).
# Automated Messaging
Automated Messages let you send messages based on **user actions** (events) or a **schedule**. You configure the trigger and timing once, then Netmera runs it continuously.
**Path:** `Messages > Automated > Create New Automated Message`
{% hint style="info" %}
**Quick steps**
1. Choose a type: [User Action](#user-action) or [Periodic](#periodic).
2. Configure trigger events and timing.
3. Configure limits and time restrictions.
4. Create content in **Setup, What, Who, Go**.
5. Launch the automation.
{% endhint %}
{% @arcade/embed url="" flowId="rbkalY98lwHUXEZ0Kq0z" %}
### Option 1: User Action
User Action automations trigger from user events. You define the event logic and the timing window.
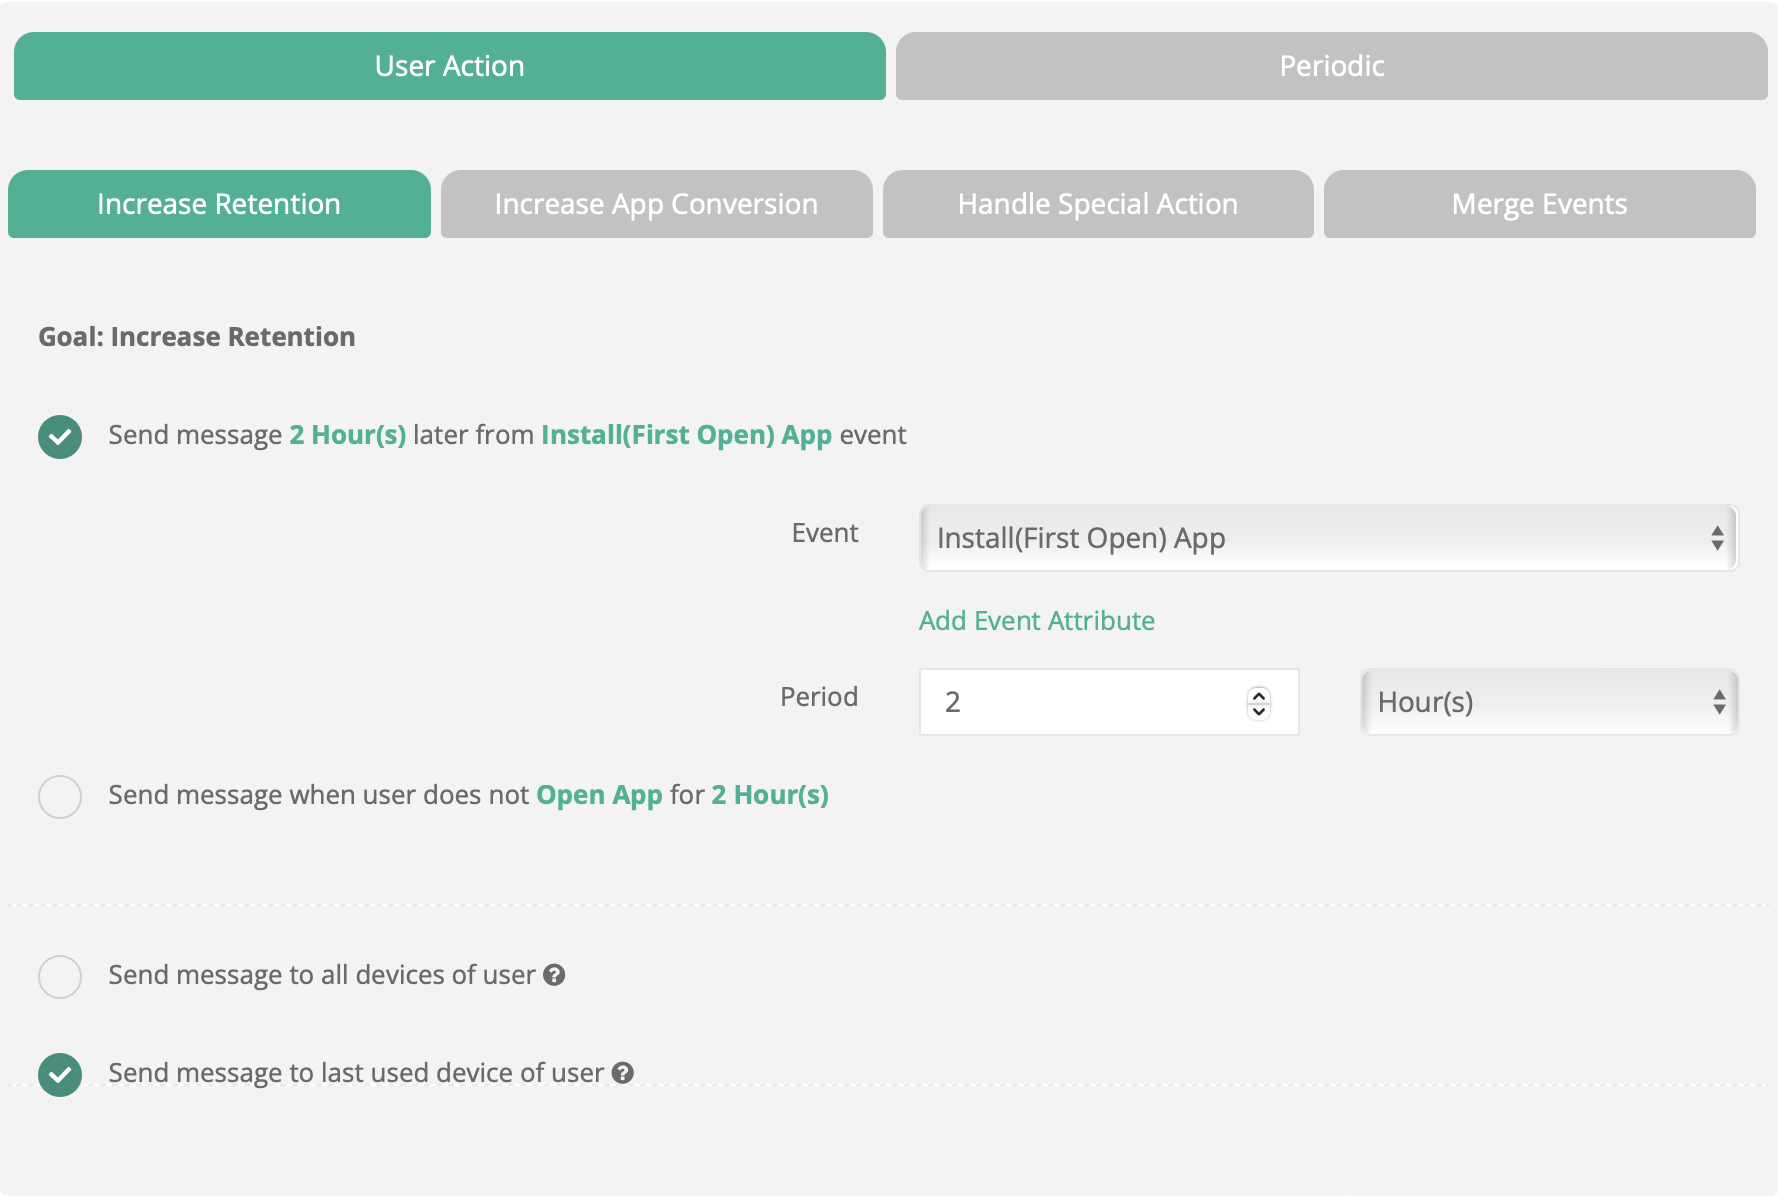
#### Increase Retention
Trigger a message after a user performs (or doesn’t perform) an event. This is the simplest event + delay flow.
**Setup**
* Select the trigger in **Event**.
* Define the delay in **Period**.
* Choose device scope:
* **Send message to all devices of user**
* **Send message to last used device of user**
Increase Retention
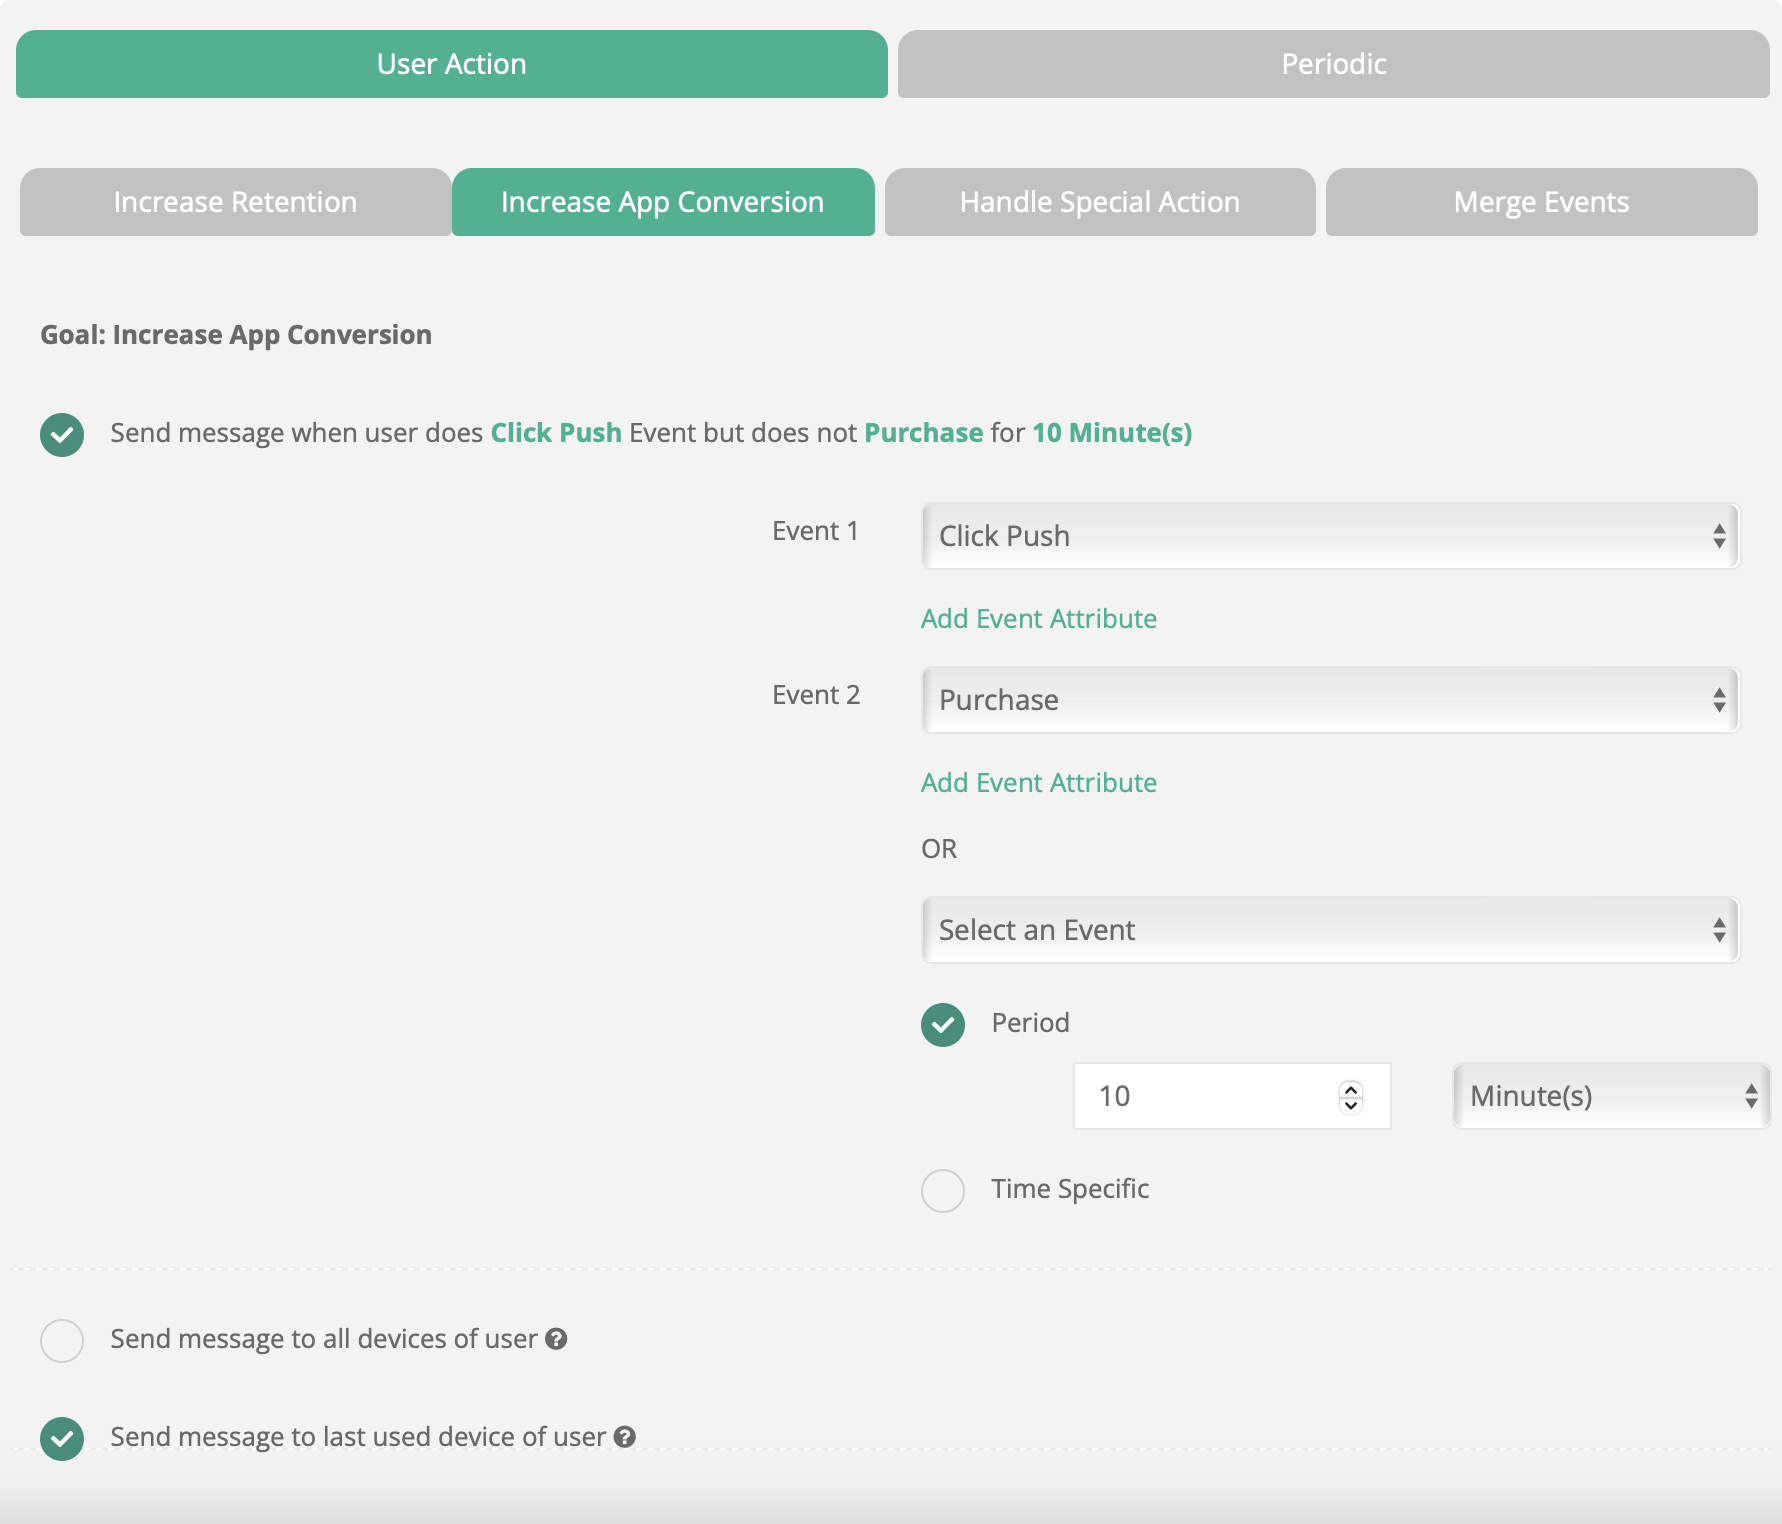
#### Increase App Conversion
Use push notifications to re-engage customers who haven't returned after a purchase by offering exclusive deals. For users yet to purchase, highlight the benefits of your product or service to encourage them to buy.
Trigger a message when users complete **Event 1** but do not complete **Event 2** in time. This is built for drop-offs and funnel conversions.
**Setup**
* Select **Event 1** and **Event 2**.
* Optionally add **Event 3** with **OR** logic to Event 2.
* Choose timing:
* **Period** for a rolling window, or
* **Time Specific** for start/end/send time.
{% hint style="success" %}
**Retention vs Conversion**
* **Increase Retention**: single event + follow-up delay.
* **Increase App Conversion**: event sequence + missing-event logic.
{% endhint %}
Increase App Conversion
#### Handle Special User Action
To handle special user actions, you can set up automated push notifications based on the **frequency of certain actions**, such as sending a message when a user makes a second in-app purchase. Trigger a message when an event happens **N times** in a time window.
**Setup**
1. Select the trigger in **Goal**.
2. Set the event count in **Occurrence**.
3. Define the window in **Capture Events in**.
Handle Special User Action
#### Merge Events
Create automation scenarios that trigger a single set of actions when multiple events occur in a specific order. In the event type section, you select the events and event attributes that you want to track, and then assign a desired event key to each event.
Trigger a single automation when multiple events happen in a specific order. Use **Context** to pass values into the message for personalization.
**Setup**
1. **Goal**: select events and event attributes. Assign an event key per event.
2. **Timing**: define ordering rules and time windows.
3. **Fallback**: define what happens if the sequence is not completed in time.
4. **Context**: map event keys to message attributes.
Merge Events
**Timing options**
* **Events must be captured in the specified order**
* **Capture events in** (time allowed for the next step)
* **Send a message if event(s) is not captured in the chosen period** (fallback path)
Merge Events - Timing
**Context**
Event Key values serve as attributes, while parameters, indicated by their **Param Value**, establish the Merge Event's context. This enables personalized and specific message creation within the content section.
Merge Events - Context
### Option 2: Periodic Messages
Periodic messages are messages that are sent **regularly on a scheduled basis**, such as daily, weekly, or monthly. These messages can be set up to be sent at a specific time, ensuring that they reach the user at a time when they are most likely to engage with them.
Periodic automations run on a fixed schedule. You can set them up as **daily**, weekly, or monthly. Use them for recurring messages like birthdays or newsletters.
Periodic
#### Weekly schedule
Select one or more days of the week.
Weekly
#### Monthly schedule
Select a pattern like “first Monday” or “third Friday”.
Monthly
### Campaign Period for User Action Notifications
Campaign Period controls how long the automation is active and how often it can send. This is where you configure scheduling for User Action automations.
#### Campaign Period
Defines the active period for the automation. Messages are sent only inside this window. Choose whether the scenario runs every time it matches, or only once.
{% hint style="info" %}
Automated messages do not use a separate “When” step. Scheduling is configured inside the automation.
{% endhint %}
#### When selected scenario occurs, send message
Send every time or only once per user.
#### User Limit
Per-user cap in a time window. Controls how many times a single user can receive the same message within a specified period.
* Per Day: Limits the number of messages a user can receive in one day.
* Per Week: Restricts the number of times the user can receive the message in a week.
* Per Month: Prevents excessive messaging to a user within a month.
* Custom Month: Allows specifying the number of messages per a custom-defined time period (e.g., 3 messages per 6 months).
#### Total Limit
Overall cap across all users. Sets the overall cap on the number of messages sent across all users during the campaign.
* Total Message Count: A numerical limit that specifies the maximum number of messages to send during the campaign.
#### Message Limit
Cap on message volume across all users. Adds a layer of control to limit how frequently a particular message is sent overall, across all users.
* Per Hour: Restricts the message from being sent more than a set number of times in an hour.
* Per Day: Limits daily message volume.
* Per Week: Sets a weekly maximum for the message.
* Per Month: Prevents excessive messaging over a longer time period.
#### Message Expire In
Drop messages not delivered within the given time. Defines how long the message remains valid for delivery after being triggered.
* A numerical value and time unit (e.g., hours or days) indicating the expiration period.
You set the message to expire in **6 hours**. If the triggering condition occurs at 3 PM, the message won’t be sent to users after 9 PM.
#### Push Time Restriction
Restricts which hours and days sending is allowed:
* Send Only Between: start/end time window.
* Send Only On: day-of-week selection.
* Delay the Push If Not Permitted: queue until allowed.
* Send Based on User’s Time Zone: evaluate windows per user.
#### Instant Show
Enables that a widget is displayed immediately upon the occurrence of the triggering condition. If, due to technical constraints, the widget cannot be displayed at the moment of the trigger, it will not reappear in subsequent sessions or on other screens.
#### Quiet Dates
Pauses the scenario on selected calendar dates.
* Sending is blocked for 24 hours on each Quiet Date.
* Evaluation follows the scenario’s time zone setting:
* User Time Zone enabled: applied per user.
* User Time Zone disabled: applied in project time zone.
#### Sending Queue
Use **Sending Queue** to place a message into a separate sending queue and define its order within that queue.
Messages without a queue value are sent immediately at the scheduled time. Messages with a queue value are processed only after all immediate messages are delivered.
The **Queue Order** value determines the order of the message within the queue. Lower numbers are processed first.
{% hint style="warning" %}
Queue Order does not make a message higher priority than messages without a queue value. It only defines the message's order within the sending queue.
{% endhint %}
### Other steps
After automation is configured, complete the standard campaign steps.
---
# Agent Instructions
This documentation is published with GitBook. GitBook is the documentation platform designed so that both humans and AI agents can read, navigate, and reason over technical content effectively. Learn more at gitbook.com.
## Querying This Documentation
If you need additional information that is not directly available in this page, you can query the documentation dynamically by asking a question.
Perform an HTTP GET request on the current page URL with the `ask` query parameter, and the optional `goal` query parameter:
```
GET https://user.netmera.com/netmera-user-guide/messaging-features/automated-messaging.md?ask=&goal=
```
`ask` is the immediate question: it should be specific, self-contained, and written in natural language.
`goal` is optional and describes the broader end goal you are ultimately trying to accomplish on behalf of the user. GitBook uses it to tailor the answer towards what is most useful for that goal.
The response will contain a direct answer to the question and relevant excerpts and sources from the documentation.
Use this mechanism when the answer is not explicitly present in the current page, you need clarification or additional context, or you want to retrieve related documentation sections.